Managing a busy restaurant with a paper logbook or outdated cash register is a recipe for chaos. That’s why setting up a restaurant POS system for your business is the most crucial step in a restaurant’s operations, like food ordering, payment processing, inventory management, and customer relationship management. Whether you’re a seasoned restaurant owner or launching a new venture, understanding how to set up a restaurant POS system can save time, reduce errors, and optimize your system’s performance.
In fact, the adoption of restaurant POS systems has transformed the way orders are managed, payments are processed, and customer data is leveraged, creating a smoother and more efficient dining experience. This is demonstrated by reports that mobile usage at points of sale in India increased significantly by 7% between 2018 and 2024.
The article below explains a step-by-step approach on how to set up a restaurant POS system that best suits your business needs and ensures a smooth and efficient transition.
How to Set Up a Restaurant POS System for Your Business?
Setting up a restaurant POS system for your restaurant involves several measures to ensure that the system meets your business needs. With the right restaurant POS setup, you can track inventory, manage orders, process payments, and streamline the customer experience. Here’s a step-by-step guide to getting your restaurant POS system set up and running effectively.
Step 1: Assess your Business Requirements
What exactly does your restaurant need from a POS system? Before diving into installation, take a step back and evaluate your business. Are you managing a cozy café or a bustling multi-outlet restaurant? Do you need real-time inventory updates or integrations with online ordering platforms? These questions help narrow down the features you need. Some aspects to consider are as follows.
- Business Size and Volume: The needs of a small café are different from those of a large restaurant.
- Menu Complexity: A simple menu versus a complex one with many modifiers affects your choice.
- Integration Needs: Consider whether you need the restaurant POS system setup to integrate with other systems, such as inventory management, online ordering, or accounting software.
Step 2: Installation and Configuration
A credible restaurant POS system setup must include installing the necessary hardware and software and configuring those systems. However, before you install a restaurant POS system, you need to ensure that your technological infrastructure supports the software and hardware you choose.
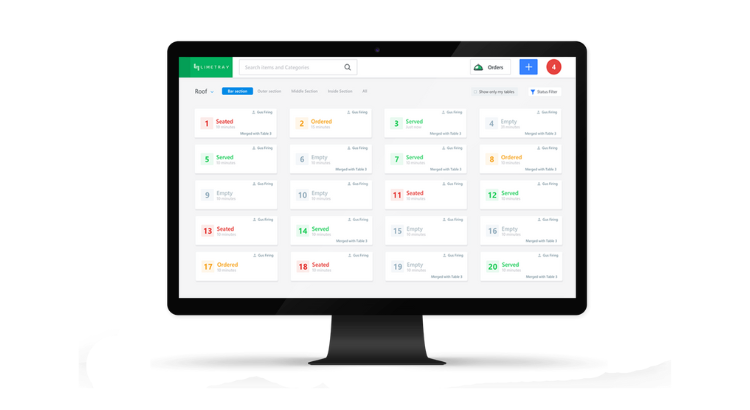
To start with, LimeTray’s restaurant POS software provides a user-friendly setup process for easy installation and a smooth launch is perfect for adapting to any restaurant layout.
Software Installation
Once you have confirmed that the restaurant POS system meets your business requirements, download and install the software on the designated terminals. Choose between cloud-based systems for flexible remote access or on-premises systems for localized control. After selecting the restaurant POS system type, create a business account and set up login credentials to manage users, transactions, and reports. Ensure a stable internet connection for uninterrupted operations.
Hardware Setup
Next, configure the essential restaurant POS system hardware, including terminals, tablets, cash drawers, receipt printers, barcode scanners, and payment processors. Depending on your needs, you may also incorporate Kitchen Display Systems (KDS) or server handhelds. Follow the setup instructions to connect devices properly, such as linking the card reader to the restaurant POS system setup, configuring the receipt printer, and testing the cash drawer.
LimeTray’s user-friendly installation process adapts to any restaurant layout. After all, brands like Sagar Ratna and Domino’s rely on LimeTray’s seamless setup for smooth operations.
Step 3: Inventory Setup
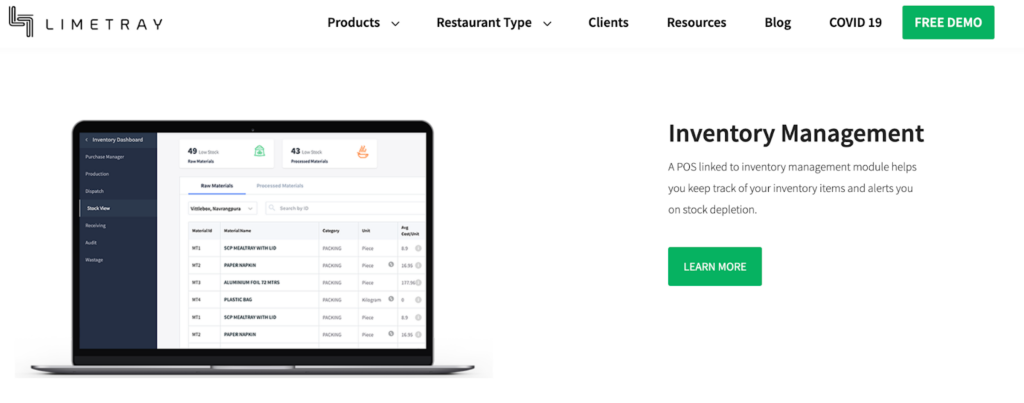
The next step is to create your inventory database, with which you can monitor stock levels and prevent shortages. Specialties or smaller commodities that do not come in bulk should be manually entered into smaller inventories. This makes sure you do not miss any special components or materials. An effective way to enter data for larger inventory is to use a CSV file upload. CSV imports are supported by many restaurant POS systems, allowing you to upload product lists, pricing, and stock levels all at once.
Adding to this functionality is LimeTray’s restaurant inventory management integration. As shown in the snapshot below, it provides easy bulk uploads, so you can easily manage purchase orders across all outlets and set up automatic alerts for low stock levels to stay on top of inventory.
Step 4: Set Up User Accounts and Permissions
Create user accounts for your staff so they can log in with their permissions to the software. To improve security and accountability, set up user accounts and assign permissions for your staff. Each staff member should have an account for tracking purposes. This way, you can easily monitor sales and performance individually.
Following that, you can customize permissions based on employee roles. For instance, cashiers may need access to transaction processing but not to inventory reports.
Step 5: Payment Methods Configuration
Modern diners expect flexible options when it comes to payments, but are you ready to give them? Your restaurant POS system setup should be ready to accept a variety of payments to meet diverse customer preferences. Integrate with trusted payment processors to provide reliable and secure payment options.
Furthermore, configure your restaurant POS system to handle multiple payment options, such as credit cards, debit cards, and digital wallet payments. Some customers prefer contactless payment options, which can enhance their dining experience.
Step 6: Restaurant POS Integration with Other Systems
Integrate your restaurant POS system with other business software to keep operations running smoothly. Sync your restaurant POS with additional business software like accounting software, customer relationship management (CRM) tools, marketing systems, inventory, and online ordering systems to unify your operations. This integration will facilitate free data flow and increase the functioning of the restaurant’s POS system.
For example, connecting with accounting software allows you to simplify bookkeeping. Restaurant CRM integration enables personalized marketing campaigns, building stronger customer relationships. Integrating the restaurant POS with online ordering and delivery systems permits real-time updating of the orders, increasing order efficiency.
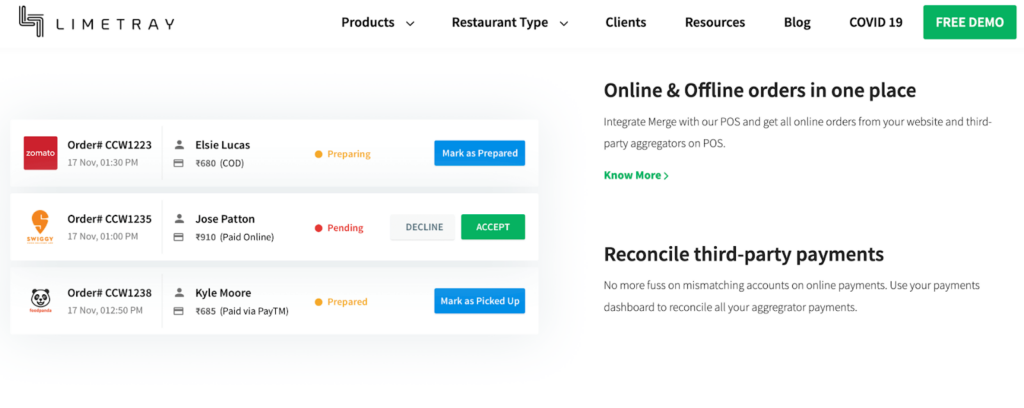
Setting up LimeTray’s restaurant POS system takes this a step further by integrating with third-party aggregators such as Swiggy, Zomato, and Uber Eats. Combining orders from these platforms into a single interface will make your order management easy as reflected in the visual below.
Step 7: Setting Up Menu
The menu and price should be implemented perfectly during the restaurant POS system setup for efficient and accurate order-taking and reporting.
Plus, design your digital menu to be intuitive, visually appealing, and easy for your staff to use during busy times. Add short descriptions, clear pricing, and mouthwatering photos to entice your customers. Divide the menu into categories, such as starters, main courses, and desserts, so that the staff can find a certain dish.
Step 8: Pricing
Using the costs of ingredients and competition to determine the original cost of a menu is how you stay competitive while maintaining profitability. From time to time, perform a market price analysis and adjust accordingly to changes in costs or any other factors.
Our restaurant POS system setup addresses problems related to specials, discounts, and promotions. This format allows one to apply discounts at the transaction time while recording the same promotion’s efficiency through the reporting system. Discover how this can help your business, click here!
Step 9: Staff Training
Even the best system is futile if your team doesn’t know how to use it. Proper worker training is crucial to ensure seamless operations and fully reap the benefits of the restaurant POS system. Your training strategy can guarantee that your employees make the most of the restaurant POS system setup. Use question-and-answer sessions, exercises, and demonstrations. The user manual, training videos, and quick reference guides should be given as handouts.
Formulate a comprehensive handout that would include all the information needed in training regarding the restaurant POS system setup, from its simplest operations down to its complex uses. It should be available and easy to understand among people involved in the work process.
Step 10: Test Your Setup
Ready to go live? Not so fast; let’s do a final check. Implement security measures by setting up user roles and permissions to protect sensitive information and prevent theft. Ensure your system is PCI compliant to handle credit card transactions securely. After that, conduct a thorough test of your restaurant POS system setup. This includes testing hardware, software, and network stability. Simulate various scenarios your restaurant might encounter to see how the system handles them.
Once you’re confident everything works seamlessly, go live and monitor performance closely during the first few weeks.
Conclusion
Setting up a restaurant POS system is an investment that can drive efficiency, enhance customer satisfaction, and keep your business organized.
Implementing restaurant POS entails developing a strategic plan, acquiring, installing, and managing the system, training your employees, ensuring security and compliance, and utilizing the data collected. These steps will ensure that your restaurant POS system is ready to meet daily demands and expand your business.
With LimeTray’s restaurant POS system set up, you can automate stock tracking, speed up service, and keep customer data secure on one platform. Customized to your restaurant’s needs, this system helps you optimize operations and drive growth with every order. Ready to take your restaurant to the next level? Book a demo with LimeTray today and see these features in action.

